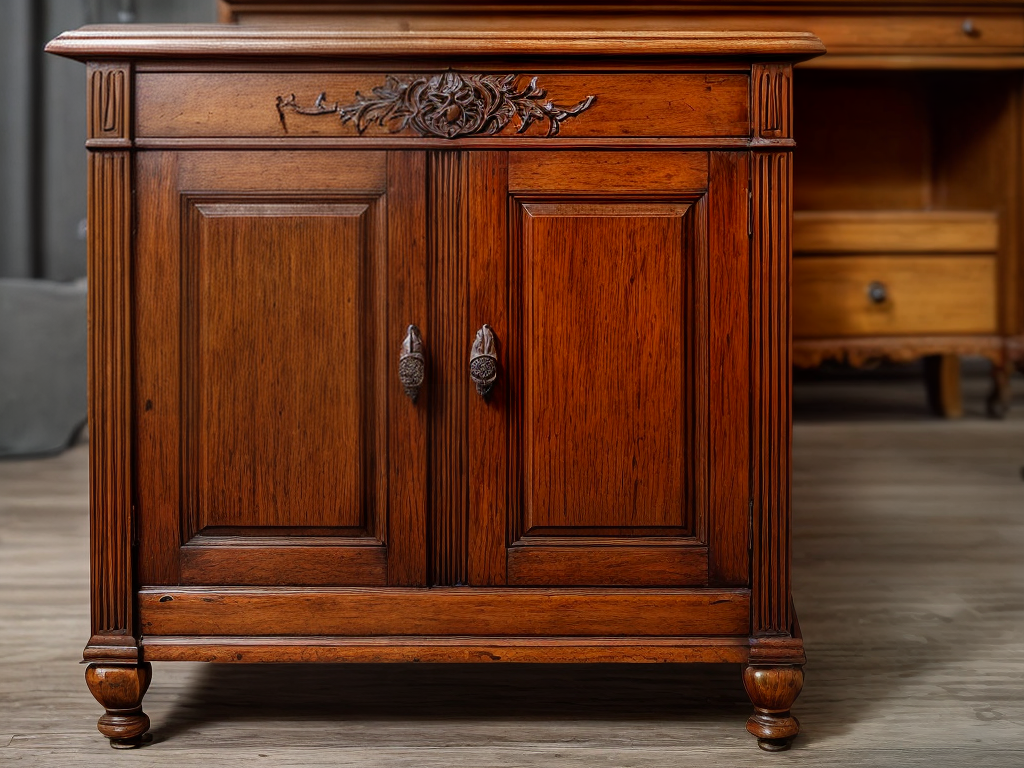
As a professional in the field of woodwork restoration, I have encountered my fair share of damaged and worn-out pieces. From weathered surfaces to cracked and splintered wood, the extent of the damage can sometimes seem insurmountable. But fear not, for there are techniques that can breathe new life into even the most deteriorated woodwork. In this discussion, I will share with you the secrets of assessing the damage, preparing the surface, repairing cracks and holes, smoothing the wood, and applying the perfect finishing touches. So, if you’ve ever wondered how to restore your beloved wooden furniture or bring back the beauty of an antique piece, join me on this journey of restoration and transformation.
Assessing the Damage
To properly restore woodwork, the first step is to assess the extent of the damage. Assessing the damage is crucial in determining the most effective restoration techniques to employ. When assessing the damage, it is important to carefully inspect the woodwork for any signs of decay, rot, or structural issues. Look for areas where the wood is cracked, warped, or discolored. Additionally, pay close attention to any signs of insect infestation or water damage.
Restoration techniques vary depending on the extent of the damage. For minor damages such as small cracks or scratches, simple repairs can be done using wood fillers or putty. However, for more severe damage like extensive rot or decay, a more extensive restoration process may be required. This could involve replacing damaged sections of woodwork or even rebuilding certain parts from scratch.
It is essential to accurately assess the damage before proceeding with any restoration work. This ensures that the appropriate techniques and materials are used, resulting in a successful restoration. Consulting with a professional or a knowledgeable expert in woodwork restoration can be beneficial in accurately assessing the damage and determining the best course of action.
Cleaning and Preparing the Surface
When it comes to cleaning and preparing the surface of woodwork for restoration, there are a few key points to keep in mind. First, it is important to thoroughly inspect and assess the surface to determine the extent of the damage and the appropriate cleaning methods to use. Next, selecting the right cleaning methods is crucial to ensure that the wood is not further damaged or compromised. Lastly, preparing the wood surface by removing any dirt, grime, or old finishes is essential for achieving a smooth and even restoration result. By following these points, you can ensure that your woodwork is properly cleaned and prepared for the restoration process.
Surface Inspection and Assessment
Using a magnifying glass, I carefully examine the surface of the woodwork, looking for any signs of damage, dirt, or previous finishes that may need to be addressed before proceeding with the restoration process. This step is crucial in determining the extent of the damage and the appropriate restoration techniques to be used. I document my findings in a table to better organize the information:
| Area of Inspection | Signs of Damage | Dirt | Previous Finishes |
|---|---|---|---|
| Top Surface | Scratches | Dust | Varnish |
| Sides | Dents | Grime | Paint |
| Back Panel | Water stains | Soil | Shellac |
| Carvings | Chipped edges | Mud | Wax |
| Hardware | Rust | None | Lacquer |
Selecting Appropriate Cleaning Methods
After completing the surface inspection and assessment, the next step is to determine the appropriate cleaning methods for preparing the woodwork for restoration. It is crucial to select the right cleaning techniques to ensure optimal results and avoid further damage to the wood. When choosing the appropriate cleaning methods, consider the type and condition of the wood, as well as the level of dirt and stains present. Common cleaning techniques for woodwork restoration include dry cleaning, wet cleaning, and chemical cleaning. Dry cleaning involves using soft brushes or vacuum cleaners to remove loose dirt and dust. Wet cleaning utilizes mild detergents or soapy water to gently clean the surface. Chemical cleaning involves the use of specific solvents or cleaners to target stubborn stains or discoloration. By carefully selecting restoration methods and using appropriate cleaning techniques, you can effectively prepare the woodwork for the restoration process.
Preparing the Wood Surface
To effectively prepare the wood surface for restoration, it is essential to thoroughly clean and prepare the surface. Wood surface preparation is a crucial step in ensuring successful restoration. Here are three key surface preparation techniques to achieve optimal results:
-
Remove all dirt and debris: Begin by dusting off the wood surface using a soft brush or vacuum cleaner. Follow up with a gentle wipe using a microfiber cloth dampened with a mild cleaning solution.
-
Strip any existing finish: If there is an old finish or paint on the wood, it needs to be removed before restoration. Use a paint stripper or sandpaper to carefully strip away the existing finish, taking care not to damage the wood.
-
Smooth out imperfections: Sand the wood surface using progressively finer grit sandpaper to smooth out any scratches, stains, or unevenness. This will create a clean and even surface for the restoration process.
Filling and Repairing Cracks and Holes
When it comes to filling and repairing cracks and holes in woodwork, there are a few key points to keep in mind. First, understanding the different types of fillers available is crucial, as each one has its own strengths and weaknesses. Second, applying the filler properly is essential for achieving a seamless repair. Lastly, the sanding and finishing process is what will truly bring the repaired area back to its original beauty. By following these points, you can ensure a successful restoration of your woodwork.
Types of Fillers
Different types of fillers can be used to effectively fill and repair cracks and holes in woodwork. When it comes to repairing wood damage, it is important to choose the right filler for the job. Here are three wood filler options that you should consider:
-
Epoxy Fillers: These fillers are durable and have excellent adhesive properties. They are ideal for repairing deep cracks and large holes in woodwork.
-
Wood Putty: Wood putty is a versatile filler that can be used to fill small to medium-sized cracks and holes. It is easy to work with and can be sanded and stained to match the surrounding wood.
-
Cellulose-based Fillers: These fillers are made from recycled wood fibers and are environmentally friendly. They are suitable for filling small cracks and shallow holes in woodwork.
Proper Application Techniques
I have found that the key to properly filling and repairing cracks and holes in woodwork lies in using the right techniques. When it comes to proper application techniques for woodwork restoration, there are a few important steps to follow. First, it is crucial to prepare the area by cleaning it thoroughly and removing any loose debris. Next, choose an appropriate filler that matches the color and texture of the wood. Apply the filler using a putty knife, making sure to fill the crack or hole completely. Smooth out the filler and remove any excess. Allow it to dry according to the manufacturer’s instructions. Finally, sand the filled area lightly to ensure a seamless finish. By following these proper application techniques, you can achieve professional results in your woodwork restoration projects.
Sanding and Finishing Process
To achieve a seamless finish when filling and repairing cracks and holes in woodwork, it is essential to properly sand and finish the filled area. Here are three sanding techniques and finishing products that will help you achieve professional results:
-
Start with coarse sandpaper: Begin by using coarse sandpaper to remove any rough edges or uneven surfaces. This will create a smooth and even base for the filler material.
-
Apply wood filler: Once the area is sanded, apply wood filler to fill in the cracks and holes. Make sure to choose a filler that matches the color and grain of the wood for a seamless blend.
-
Sand and finish: After the filler has dried, use finer grit sandpaper to sand the filled area until it is smooth and level with the surrounding wood. Finally, apply a suitable finishing product such as varnish or paint to protect the wood and enhance its appearance.
Sanding and Smoothing the Wood
Using a high-quality sandpaper and a firm grip, I carefully smooth the surface of the wood, removing any roughness or imperfections. Sanding is a crucial step in the wood restoration process as it prepares the surface for further treatment, such as staining or varnishing, and enhances the overall appearance of the wood.
To ensure the best results, it is important to choose the right type and grit of sandpaper for the task at hand. For initial sanding, a coarse grit (around 80-100) is recommended to quickly remove any existing finish or deep scratches. As the process progresses, gradually move to finer grits (around 120-150) to achieve a smoother surface.
In addition to the sandpaper, using a sanding block or an electric sander can help distribute the pressure evenly and prevent uneven sanding. It is crucial to maintain a consistent motion and avoid pressing too hard, as this can result in uneven surfaces or even damage the wood.
To guide you further, here’s a table summarizing the different sandpaper grits and their recommended uses:
| Grit | Recommended Use |
|---|---|
| 80-100 | Initial sanding, heavy removal of material |
| 120-150 | Smoothing the surface, removing minor imperfections |
| 180-220 | Preparing the surface for finishing |
| 320-400 | Final sanding before applying finishes |
| 600-800 | Fine sanding for a polished look |
Staining and Finishing Techniques
After achieving a smooth and flawless surface through sanding, the next step in woodwork restoration involves implementing effective staining and finishing techniques. These techniques are crucial in bringing out the natural beauty of the wood and protecting it for years to come. Here are three key considerations when it comes to staining and finishing woodwork:
-
Stain removal: Before applying a new stain, it is essential to remove any existing stains or finishes. This can be done using a variety of methods, such as sanding, chemical strippers, or heat guns. By removing old stains, you create a clean canvas for the new stain to adhere to, ensuring a more uniform and professional finish.
-
Choosing the right stain: When selecting a stain, consider the type of wood you are working with and the desired outcome. Different stains have varying levels of transparency, allowing the wood’s natural grain to show through or providing more opaque coverage. Experimenting with different stains on test pieces can help you find the perfect color and finish for your project.
-
Applying the finish: Once the stain has dried, it’s time to apply the finishing coat. This step serves to protect the wood from moisture, UV damage, and everyday wear and tear. There are various finishes available, including polyurethane, varnish, and lacquer. Choose a finish that suits your project and follow the manufacturer’s instructions for proper application and drying times.
Protecting and Maintaining the Restored Woodwork
Maintaining the restored woodwork requires regular cleaning and proper care to preserve its beauty and longevity. To protect the woodwork from damage, it is essential to employ various techniques and maintenance methods. One effective technique is to apply a protective coating, such as varnish or lacquer, to create a barrier against moisture, UV rays, and other harmful elements. Additionally, using furniture wax or polish can provide an extra layer of protection and enhance the wood’s natural shine.
Regular cleaning is crucial for maintaining the restored woodwork. Dusting the surfaces with a soft, lint-free cloth or using a gentle vacuum attachment can help remove dirt and debris without causing scratches. Avoid using harsh chemicals or abrasive cleaners, as these can damage the wood’s finish. Instead, opt for mild soap and water for deeper cleaning, making sure to dry the surface thoroughly afterward.
In terms of maintenance methods, it is important to inspect the restored woodwork regularly for any signs of wear or damage. Addressing issues promptly, such as repairing scratches or reapplying protective coatings, can prevent further deterioration. Additionally, maintaining a consistent indoor environment with stable humidity and temperature levels can help preserve the woodwork’s integrity.