When it comes to custom woodworking, the journey from sketch to structure is a remarkable process that brings imagination to life. From the initial concept to the finishing touches, every step is meticulously planned and executed to create stunning pieces that stand the test of time. With an unwavering attention to detail and a passion for craftsmanship, custom woodworkers transform raw materials into functional works of art. So, how exactly does this process unfold? Join me as we explore the fascinating world of custom woodworking and discover the secrets behind creating beautifully crafted pieces that will leave you in awe.
Conceptualizing the Design
When conceptualizing the design for custom woodworking projects, I frequently begin by immersing myself in the client’s vision and carefully considering their specific needs and preferences. This initial step is crucial in ensuring that the final product aligns perfectly with their expectations. To achieve this, I engage in a creative process that involves seeking design inspiration from various sources.
Design inspiration can come from a multitude of places. I often draw inspiration from nature, architecture, and even art. By studying these diverse sources, I am able to gather ideas and concepts that can be incorporated into the custom woodworking project. This process allows me to create unique and innovative designs that stand out.
Once I have gathered design inspiration, I begin the creative process. This involves sketching out different ideas and exploring various design possibilities. I consider factors such as functionality, aesthetics, and the client’s specific requirements. This stage requires careful thought and attention to detail to ensure that the design is not only visually appealing but also practical and functional.
Selecting the Right Wood
When selecting the right wood for a custom woodworking project, there are two main factors to consider: wood species and grain pattern. The choice of wood species will determine the overall characteristics and appearance of the finished piece, while the grain pattern will affect its texture and visual appeal. It is important to carefully evaluate different wood options and their respective grain patterns to ensure that they align with the desired outcome of the project.
Wood Species Selection
To select the right wood for your custom woodworking project, I carefully consider the unique characteristics and qualities of each wood species. Here are four key factors I consider when selecting wood species:
-
Durability: I assess the wood’s ability to withstand wear and tear over time, ensuring it can hold up well in various environments and conditions.
-
Grain pattern and texture: I examine the wood’s grain patterns and texture to determine how it will contribute to the overall aesthetic of the project.
-
Workability: I evaluate how easily the wood can be worked with using different woodworking techniques, ensuring it can be shaped, cut, and joined effectively.
-
Finishing potential: I consider how well the wood takes wood finishing techniques, such as staining or varnishing, to achieve the desired look and protection.
Grain Pattern Considerations
I carefully consider the unique characteristics and qualities of each wood species when selecting the right wood for my custom woodworking projects, with a particular focus on grain pattern considerations. Grain pattern plays a crucial role in the overall aesthetic and durability of the finished piece. The pattern, which is determined by the arrangement of fibers in the wood, can range from straight and uniform to wavy or irregular. By understanding the different types of grain patterns and their effects on the final product, I am able to make informed decisions on which wood to use for specific projects. For example, woods with straight grain patterns are often preferred for furniture pieces that require stability and strength, while those with more pronounced and unique grain patterns are often chosen for decorative pieces that showcase the natural beauty of the wood. By carefully selecting wood based on grain pattern considerations, I am able to create custom woodworking pieces that are not only visually appealing but also structurally sound.
Developing Detailed Drawings
As part of the custom woodworking process, I develop detailed drawings to ensure precision and accuracy in the final product. These drawings serve as a visual representation of the design and help in the fabrication process. Here are the key steps I follow when developing detailed drawings:
-
Design visualization: I begin by visualizing the design concept and understanding the client’s requirements. This involves considering the size, shape, and functionality of the piece.
-
Measurements and dimensions: Once the design is finalized, I take accurate measurements of the space where the piece will be installed. This ensures that the final product fits perfectly in the intended location.
-
3D modeling: Using advanced software, I create a detailed 3D model of the design. This allows me to visualize the piece from different angles and make necessary adjustments before moving forward.
-
Detailed drawings: Based on the 3D model, I create detailed drawings that include all necessary dimensions, joinery techniques, and material specifications. These drawings serve as a roadmap for the fabrication process, ensuring that each component is accurately cut and assembled.
Precise Measurements and Planning
When it comes to custom woodworking, precise measurements are crucial for a successful project. Accuracy in measurement ensures that the final piece fits perfectly and functions as intended. Detailed project blueprints serve as a guide, helping to plan and visualize the final product before any cuts are made.
Measurement Accuracy
Achieving precise measurements and careful planning are essential steps in the custom woodworking process. To ensure measurement accuracy, the following strategies and tools should be employed:
- Utilize high-quality measurement tools: Invest in reliable measuring instruments, such as tape measures, calipers, and rulers, to obtain accurate readings.
- Double-check measurements: Always verify measurements to minimize errors and ensure consistency throughout the woodworking project.
- Implement quality control measures: Regularly inspect and assess measurements to identify any potential discrepancies or inaccuracies.
- Plan meticulously: Thoroughly plan every aspect of the project, including measurements, dimensions, and joinery techniques, to avoid costly mistakes and achieve the desired outcome.
Detailed Project Blueprints
To ensure precise measurements and meticulous planning in the custom woodworking process, detailed project blueprints play a crucial role. These blueprints serve as a roadmap, guiding the entire project from start to finish. They provide a clear visual representation of the final design, allowing craftsmen to accurately measure and cut materials with precision. Additionally, project blueprints enable effective cost estimation by outlining the necessary materials and quantities required for the project. They also assist in creating a realistic project timeline, as they provide a detailed breakdown of each step involved in the construction process. With these blueprints in hand, woodworkers can confidently proceed with their projects, knowing that every measurement and detail has been carefully considered and planned.
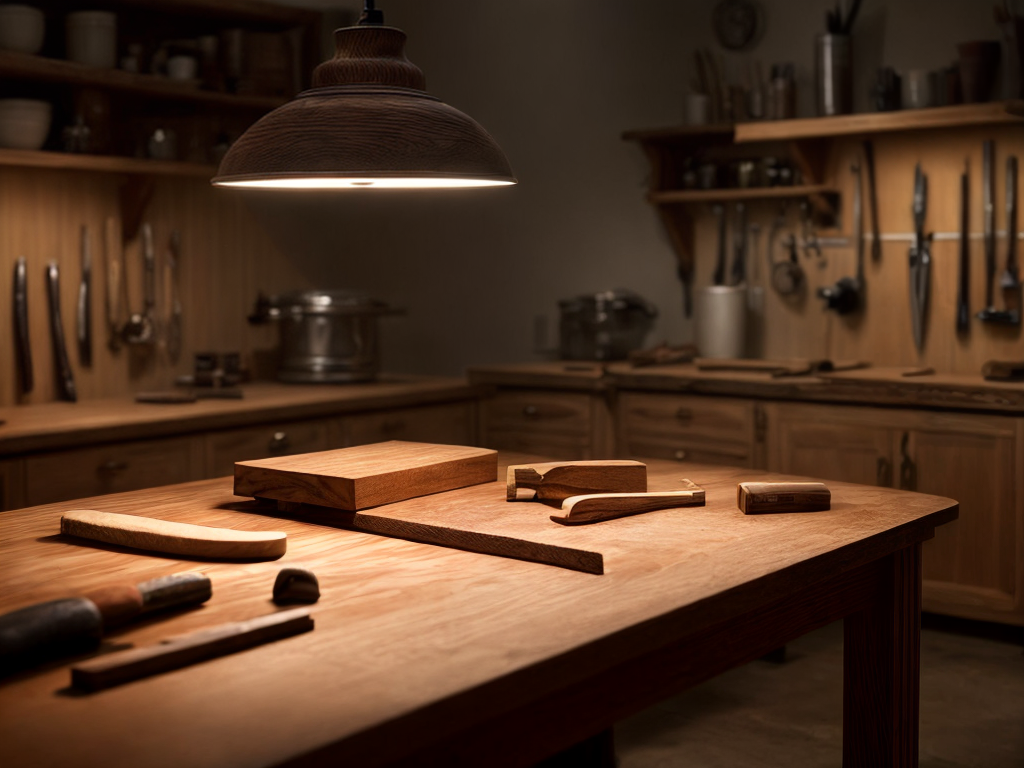
Material Preparation and Cutting
I carefully prepare and cut the materials for the custom woodworking project. This stage is crucial for achieving precise and accurate results. Here are the steps I follow:
-
Measurement and Marking: I start by measuring the dimensions of the wood pieces needed for the project. Using a combination square and a tape measure, I mark the measurements on the wood surface. This ensures that the cuts are made at the correct lengths and angles.
-
Selecting the Right Tools: Next, I choose the appropriate woodworking tools for the task at hand. Depending on the project, this may include a table saw, circular saw, jigsaw, or hand saw. I ensure that the tools are sharp and properly calibrated to make clean and smooth cuts.
-
Setting up the Workstation: Before cutting the materials, I prepare a safe and organized workstation. This includes securing the wood firmly in place using clamps or a workbench, and ensuring there is adequate lighting for visibility.
-
Making the Cuts: With all the preparations in place, I proceed to make the necessary cuts according to the project requirements. I follow proper woodworking techniques, such as using a push stick or a miter gauge, to ensure my safety and the accuracy of the cuts.
Joinery Techniques and Assembly
Joinery techniques and assembly play a crucial role in creating sturdy and visually appealing custom woodworking projects. The way pieces of wood are connected together determines the strength and durability of the final product. There are various joinery techniques that woodworkers employ, each with its own advantages and applications.
One common joinery technique is the dovetail joint, known for its strength and aesthetic appeal. This joint consists of interlocking pins and tails that create a strong bond between two pieces of wood. Another popular technique is the mortise and tenon joint, which involves a projecting tenon on one piece of wood fitting into a corresponding mortise on another piece. This creates a strong and stable connection.
During the assembly process, precision and accuracy are essential. Woodworkers carefully fit and secure the joints, ensuring that all pieces align perfectly. Clamps, screws, and glue are commonly used to hold the pieces together while the adhesive dries. Attention to detail is critical to achieve a flawless finish.
To illustrate the different joinery techniques and their applications, consider the following table:
| Joinery Technique | Strength | Aesthetic Appeal | Common Applications |
|---|---|---|---|
| Dovetail Joint | High | High | Drawer construction, cabinetmaking |
| Mortise and Tenon Joint | High | Medium | Furniture, frames, doors, windows |
| Butt Joint | Low | Low | Simple boxes, shelving |
| Finger Joint | Medium | Medium | Boxes, cabinetmaking |
Mastering joinery techniques and the assembly process is crucial for creating custom woodworking projects that are not only visually appealing but also structurally sound. By carefully selecting and executing the appropriate joinery technique, woodworkers can ensure the longevity and durability of their creations.
Finishing Touches and Finalizing the Piece
After completing the joinery techniques and assembly, the next step in the custom woodworking process involves adding the finishing touches and finalizing the piece. This stage is crucial as it enhances the appearance and durability of the woodwork. Here are the key steps involved in this process:
-
Sanding Techniques: Sanding is a vital step in achieving a smooth and polished finish. It helps to remove any imperfections, such as rough surfaces or uneven edges. Start with a coarse-grit sandpaper and gradually move to finer grits for a refined finish. Pay attention to details and ensure that all surfaces are properly sanded.
-
Applying Finishes: Finishes not only protect the wood but also enhance its natural beauty. There are various finishes to choose from, including oils, varnishes, lacquers, and paints. Before applying the finish, ensure that the surface is clean and dust-free. Use a brush, cloth, or spray to evenly apply the finish. Allow sufficient drying time between coats and consider adding multiple layers for added protection.
-
Sealing Joints: To ensure longevity and stability, it is important to seal any joints in the woodwork. This can be done using wood glue, epoxy, or other appropriate sealants. Apply the sealant carefully and follow the manufacturer’s instructions for optimal results.
-
Final Touches: Lastly, inspect the piece for any remaining imperfections or inconsistencies. Make any necessary adjustments, such as trimming or sanding specific areas. Ensure that the piece is structurally sound and visually appealing before considering it complete.