When it comes to furniture repairs, woodwork can be a tricky task. Did you know that there are simple tips and techniques that can help you restore your beloved wooden pieces back to their former glory? In this discussion, I will guide you through the process of assessing damage, gathering the necessary tools, and repairing scratches, dents, loose joints, cracks, and more. Whether your furniture has suffered from years of wear and tear or an unfortunate accident, these furniture first aid tips will empower you to revive and renew your cherished pieces. So, let’s roll up our sleeves and get started on the journey to restoring your woodwork to its original beauty.
Assessing the Damage
When assessing the damage to your woodwork, it is crucial to thoroughly inspect the affected areas for any signs of wear, rot, or structural issues. This step is essential in order to accurately assess the extent of the damage and identify the cause. Start by visually examining the woodwork, paying close attention to any visible cracks, dents, or discoloration. Use your fingers to run along the surface and feel for any unevenness or rough spots. Look for any signs of moisture, such as warping or mold growth, as this could indicate underlying rot. Additionally, check for any loose or broken pieces, as this could be a potential safety hazard. It is important to be thorough in this process, as even minor damage can lead to more significant issues if left untreated. By properly assessing the extent of the damage and identifying its cause, you will be better equipped to determine the necessary repairs and ensure the long-term durability of your woodwork.
Gathering the Necessary Tools
After thoroughly assessing the damage to your woodwork, the next step is to gather the necessary tools for the repairs. Tool selection and proper technique are crucial in achieving successful woodwork repairs. Here are three essential tools you will need:
-
Sanding Block: A sanding block is essential for smoothing out rough edges and removing old finishes. Choose a sanding block with a comfortable grip and different grits of sandpaper for versatility.
-
Wood Filler: Wood filler is a must-have for repairing cracks, dents, and holes in wooden surfaces. Opt for a high-quality wood filler that matches the color and grain of your woodwork for seamless repairs.
-
Clamps: Clamps are indispensable for holding pieces of wood together while the glue dries. They help ensure a tight bond and prevent any movement during the repair process. Choose clamps of various sizes to accommodate different project sizes.
When selecting your tools, prioritize quality and durability over cost. Investing in high-quality tools will not only make your repairs easier but also ensure long-lasting results. Remember to use proper technique when using each tool to avoid any accidents or further damage to your woodwork.
Now that you have the necessary tools, you are ready to move on to the next step: preparing the damaged area for repair.
Repairing Scratches and Surface Damage
To effectively repair scratches and surface damage on your woodwork, it is crucial to follow a systematic approach using the right techniques and materials. When it comes to repairing scuffs and minimizing surface damage, there are a few key steps to keep in mind.
First, assess the extent of the damage. Is it a shallow scratch or a deeper gouge? This will help determine the appropriate repair method. For shallow scratches, you can often use a fine-grit sandpaper to gently buff out the imperfections. Be sure to sand along the grain of the wood for the best results.
For deeper scratches or gouges, you may need to use a wood filler. Choose a filler that matches the color of your woodwork and apply it to the damaged area. Smooth it out with a putty knife, and once it dries, sand it down until it is flush with the surrounding surface.
After repairing the scratches, it’s important to protect your woodwork from future damage. Consider applying a topcoat or sealant to provide an extra layer of protection against scratches and scuffs.
Fixing Dents and Deep Gouges
When it comes to fixing dents in woodwork, it’s important to fill them effectively to achieve a smooth surface. I’ll share some tips on how to do this properly. Additionally, deep gouges can be sanded out to restore the integrity of the wood and create a seamless finish.
Filling Dents Effectively
For effective repair of dents and deep gouges in woodwork, I recommend utilizing a high-quality wood filler. Here are three effective techniques to fill dents and prevent future damage:
-
Clean the area: Remove any debris or loose wood particles from the dent using a soft cloth or brush. This ensures a clean surface for the filler to adhere to.
-
Apply the filler: Using a putty knife, spread the wood filler evenly over the dent, filling it completely. Make sure to follow the manufacturer’s instructions for drying time.
-
Sand and finish: Once the filler has dried, use fine-grit sandpaper to smooth out the surface. Blend the repaired area with the surrounding woodwork for a seamless finish. Finally, apply a suitable finish or paint to match the rest of the piece.
Sanding Out Deep Gouges
After effectively filling dents in woodwork, the next step is to address deep gouges by sanding them out for a smooth and seamless finish. Repairing woodwork requires proper sanding techniques to achieve the desired results. When dealing with deep gouges, it is essential to start with coarse-grit sandpaper to remove the bulk of the material. Use a sanding block or a power sander for larger areas to ensure even sanding. Gradually move to finer grits to achieve a polished surface. Take care not to oversand or create uneven surfaces. It is important to maintain a steady hand and apply consistent pressure while sanding. Remember to clean the surface thoroughly after sanding to remove any dust or debris. By following these sanding techniques, you can effectively repair woodwork and restore its natural beauty.
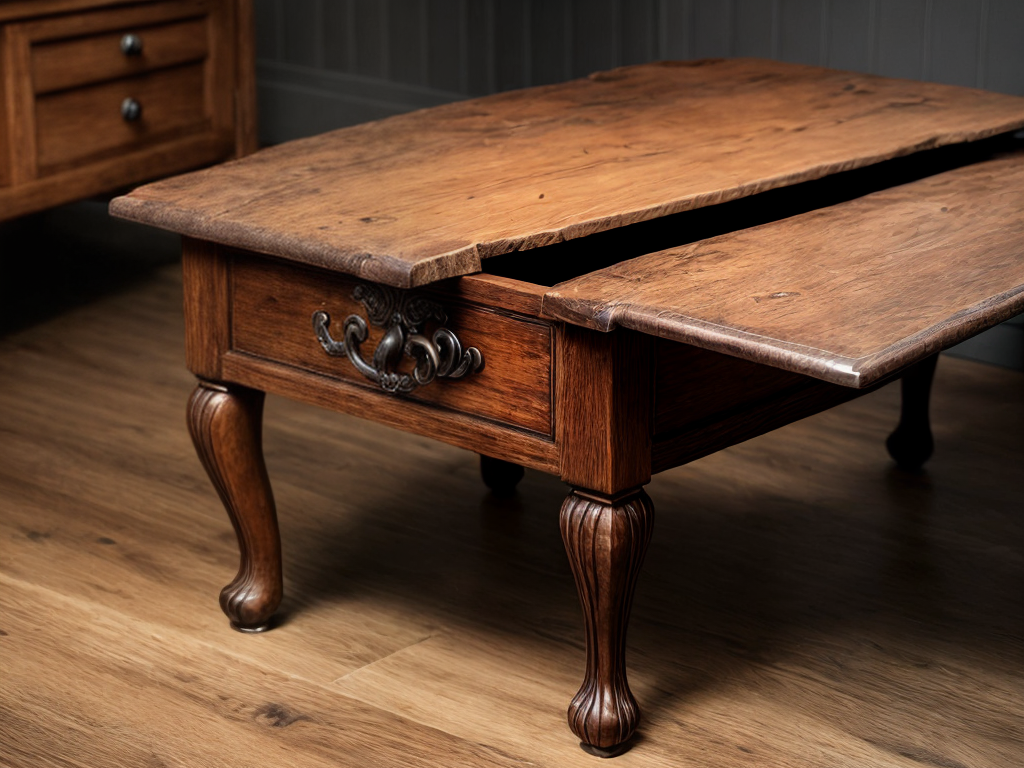
Reattaching Loose Joints
To effectively reattach loose joints in woodwork, assess the damage and gather the necessary tools for a secure and lasting repair. Here are three steps to help you successfully repair wobbly legs and strengthen weak joints:
-
Identify the cause of the loose joint: Before you begin the repair, it’s important to determine why the joint became loose in the first place. Common causes include wear and tear, moisture damage, or improper assembly. Understanding the underlying issue will help you choose the right repair method.
-
Disassemble the joint: Carefully take apart the joint, removing any old adhesive or fasteners. Clean the surfaces thoroughly to ensure a strong bond when reattaching the joint. Use gentle sanding or scraping if necessary to remove any debris or rough edges.
-
Apply the appropriate adhesive or fasteners: Depending on the type of joint and the level of damage, you may choose to use wood glue, epoxy, or even screws or dowels. Apply the adhesive or insert the fasteners according to the manufacturer’s instructions, ensuring a tight fit and proper alignment. Clamp the joint together until the adhesive dries or the fasteners are secure.
Filling and Repairing Cracks
Now that we have successfully reattached loose joints in woodwork, let’s move on to addressing the next issue: filling and repairing cracks. Cracks in woodwork are not only unsightly but can also compromise the structural integrity of the furniture. To effectively fill and repair cracks, two common materials used are wood putty and epoxy resin.
Wood putty is a versatile material that is primarily composed of wood fibers and binders. It is an ideal choice for filling small to medium-sized cracks in woodwork. To use wood putty, simply apply it to the crack and smooth it out with a putty knife. Once it dries, you can sand it down to achieve a seamless finish.
For larger cracks or those that require added strength, epoxy resin is the preferred choice. Epoxy resin is a two-part adhesive that consists of a resin and a hardener. When mixed together, it creates a strong and durable bond. To repair cracks with epoxy resin, first clean the crack and apply the resin mixture, making sure to fill the entire crack. Allow it to cure according to the manufacturer’s instructions before sanding and finishing.
Restoring the Finish and Final Touches
To restore the finish and add final touches to the woodwork, carefully select an appropriate finish and apply it evenly for a polished and long-lasting result. Here are three essential steps to restore the shine and achieve a flawless finish:
-
Choose the right finish: Consider the type of wood and the desired outcome when selecting a finish. Options include oil-based finishes for a natural look, lacquer for a glossy finish, or shellac for a traditional appearance. Research the characteristics of each finish to ensure it matches your woodwork.
-
Prepare the surface: Before applying the finish, thoroughly clean the woodwork to remove any dirt or debris. Sand the surface gently with fine-grit sandpaper to create a smooth and even texture. Ensure the area is free from dust and wipe it down with a tack cloth.
-
Apply the finish: Use a clean, lint-free cloth or a brush to apply the finish evenly. Follow the manufacturer’s instructions for drying times and apply multiple thin coats, allowing each coat to dry completely before adding the next. This will help to achieve a professional-looking finish.
To restore the shine of your woodwork, consider using polishing techniques such as buffing with a soft cloth or applying a wood polish product specifically designed for the type of finish you used. Regular maintenance and care will help preserve the beauty of your woodwork for years to come.